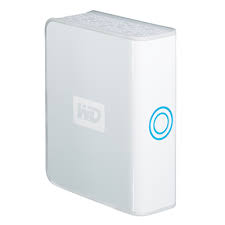
 Today we experienced a NAS hardware failure on the WD MyBook World single network drive. The drive was still in perfect condition just the circuit was fried. This post details the steps taken to recover data from the drive, assuming there is a need.
What you will need:
- Latest version of VirtualBox
- Latest version of VirtualBox Extensions
- A supported version of Ubuntu or other distro
- sata – usb drive adapter
- patience
Process:
- The first step is of course plugging in the drive and connecting to your computer
- Open drive manager to determine the drive number
- Open Command Prompt and go to the VirtualBox install folder (C:\Program Files\Sun(Oracle)\VirtualBox
- Run command:
VBoxManage internalcommands createrawvmdk -filename “<path to your vmfk storage>\wd-drive.vmdk” -rawdisk \\.\PhysicalDriveX- (optionally) You can append PhysicalDriveX -partitions x,x if you only want a specific partition of the drive loaded
- After a successful response, open Virtualbox
- Configure the Ubuntu VM by adding the “wd-drive.vmdk” to the available storage volumes and attaching to the VM
- Boot the VM (install ubuntu if necessary and load extensions – extensions are needed so you can see the full screen)
- The drive should respond to ubuntu attempting to access the partitions while booting.
- Once Ubuntu is loaded, the drive will NOT be accessible. Now you need to force mount the degraded RAID member. (Yes the single drive is a RAID member). But first you need to determine which device to mount. Install fdisk: sudo apt-get install fdisk
- Run sudo fdisk -l to get the device name, in my case it was /dev/sdb1
- Install mdadm: sudo apt-get install msadm, you can ignore the postfix configs and such
- Run: sudo mdadm –assemble –run /dev/md0 /dev/sdb1
- Mount the drive, run: mount /dev/md0 /media/wd-drive
- Browse the file system by clicking “Files” on the Ubuntu You should see the drive under Devices.
- You’re not done yet! Go back to the Terminal and you will now need to take ownership of the drive and files so they can be accessed. CD to /media and get the device mount (in my case it put the GUID of the device and not the mount name I specified). Run: sudo chown <user> <mount name>. This will take a bit depending on drive size.
- You should be good to access the files and copy what is needed.
This post was made after the process was completed. I may have missed a step. If so, feel free to let me know.
Acknowledgements:
http://www.sysprobs.com/access-physical-disk-virtualbox-desktop-virtualization-software
http://serverfault.com/questions/383362/mount-unknown-filesystem-type-linux-raid-member